Recently I learned this amazing concept of Web Component!
It's amazing because you can create your very own component using Javascript!

And you might be thinking, that creating components is really common in today's web development through the use of Frontend Frameworks such as: Angular, Vue, and React.
But what if I tell you that you don't need any Frontend Frameworks to achieve similar results by using pure Javascript?

Here's an example of a Web Component:
<tile-mine value="1" revealed="false"></tile-mine>
tile-mine is a custom HTML element, where you can bind values in its attribute.
Now, let's try to look at the Javascript codes you need in order to create this tile-mine Web Component.
export class Tile extends HTMLElement {
constructor() {
super();
this.root = this.attachShadow({ mode: 'open' });
this.prop = {
value: '1',
isRevealed: false
};
this.updateDOM();
}
set revealed(revealed) {
this.prop.isRevealed = revealed;
this.updateDOM();
}
get revealed() {
return this.prop.isRevealed;
}
set value(value) {
this.prop.value = value;
this.updateDOM();
}
get value() {
return this.prop.value;
}
updateDOM() {
this.root.innerHTML = `
${componentStyle}
${this.prop.isRevealed ? 'tile-opened' : ''}">
class="tile ${this.prop.isRevealed ? this.tileValue() : ''}
`;
}
static get observedAttributes() {
return ['value', 'revealed'];
}
attributeChangedCallback(name, oldValue, newValue) {
switch (name) {
case 'value':
this.value = newValue;
break;
case 'revealed':
this.revelead = newValue;
break;
}
}
}
customElements.define('tile-mine', Tile);
Now wait..... After seeing the Javascript codes, You might be thinking that I lied about not using any Javascript Frameworks.

Nope, it is certain that we will not use any Javascript Frameworks, but we are going to use a module bundler which is Webpack.
Now let's jump into coding, we are going to utilize the concept of Web Component by creating a Minesweeper Game.
1. Project Setup
- Open your command prompt, change directory to any folder location you want and enter the following commands
mkdir minesweeper-wc && cd minesweeper-wc && npm init -y
This will initialize our npm project.
- Install webpack, webpack-cli and webpack-dev-server
npm install webpack webpack-cli webpack-dev-server --save-dev
- Install the necessary plugins for Webpack, to learn more click here
npm install html-webpack-plugin copy-webpack-plugin --save-dev
Now, let's open the created project using Visual Studio Code
- Webpack configuration
const path = require('path');
const HtmlWebpackPlugin = require('html-webpack-plugin');
const CopyPlugin = require('copy-webpack-plugin');
module.exports = {
entry: './src/index.js',
output: {
filename: 'main.js',
path: path.resolve(__dirname, 'dist')
},
plugins: [
new HtmlWebpackPlugin({
template: './src/index.html'
}),
new CopyPlugin([
{ from: './src/assets', to: 'assets' }
])
],
devServer: {
contentBase: path.join(__dirname, 'dist'),
compress: true,
port: 8000
}
};
devServer - contains the development server config when running Webpack for development.
output - contains the configuration for the build result, by default we are using dist as the folder that will hold our build files, and main.js to bundle and hold all our Javascript files
HTMLWebpackPlugin - will move the HTML file to build folder
CopyPlugin - will move folders to the build folder.
Let's update the package.json to use our custom build commands.
{
"name": "minesweeper-wc",
"version": "1.0.0",
"description": "",
"main": "index.js",
"scripts": {
"test": "echo \"Error: no test specified\" && exit 1",
"build": "webpack",
"serve": "webpack-dev-server"
},
"keywords": [],
"author": "",
"license": "ISC",
"dependencies": {
"webpack": "^4.41.5"
},
"devDependencies": {
"copy-webpack-plugin": "^5.1.1",
"html-webpack-plugin": "^3.2.0",
"webpack-cli": "^3.3.10",
"webpack-dev-server": "^3.10.2",
}
}
build - will run using npm run build that will bundle all the codes and put it inside dist folder ready for deployment.
serve - will run using npm run serve that will serve our project in http://localhost:8000
2. Web components
Create the following files and folders.

src - will contain all the files and folders of our project
assets - all CSS, images and other none HTML and js files would be here
components - all of our web components would be located here.
index.html - HTML entry point
index.js - the file that would load and bootstrap all our javascript codes
Let's now add code to our index.html:
DOCTYPE html>
<html lang="en">
<head>
<meta charset="UTF-8" />
<meta name="viewport" content="width=device-width, initial-scale=1.0" />
<meta http-equiv="X-UA-Compatible" content="ie=edge" />
<title>Webcomponent Minesweeper</title>
</head>
<body>
<main>
</main>
</body>
</html>
We will wrap everything on main tag since we are creating a PWA app.
Now let's create our very first Web Component:

Since we are creating a Minesweeper game, let's create a tile component.
Create tile.js file under src > components > tile.js
export class Tile extends HTMLElement {
constructor() {
super();
}
}
customElements.define('tile-mine', Tile);
We have extended the HTMLElement native class of Javascript, which will allow us to extend it and create our own HTML element.
customElements.define('tile-mine', Tile);
This line of code lets us define our desired tag name and its class definition.
Next is let's assign styles and adjust the HTML content of our tile-mine element.
const componentStyle = `
.tile {
background:#6BBBFD;
height:100%;
width:100%;
display:flex;
justify-content:center;
align-items:center;
cursor:pointer;
transition:0.2slinear;
}
.tile-opened{
background-color:#f0f0f0;
}
.tile:hover{
opacity:0.8;
}
.tile {
background: #6BBBFD;
height: 100%;
width: 100%;
display: flex;
justify-content: center;
align-items: center;
cursor: pointer;
transition: 0.2s linear;
}
.tile-opened {
background-color: #f0f0f0;
}
.tile:hover {
opacity: 0.8;
}
`;
export class Tile extends HTMLElement {
constructor() {
super();
}
updateDOM() {
this.innerHTML = `
${componentStyle}
}
}
customElements.define('tile-mine', Tile);
componentStyle - a variable that holds our component styles.
this.innerHTML - since we are extending HTMLElement we can now access its properties and methods, innerHTML allows us to put content in our web component.
Now let's import our Tile class inside the index.js
import './components/tile';
Next is to add the tile component inside our index.html
DOCTYPE html>
<html lang="en">
<head>
<meta charset="UTF-8" />
<meta name="viewport" content="width=device-width, initial-scale=1.0" />
<meta http-equiv="X-UA-Compatible" content="ie=edge" />
<title>Webcomponent Minesweeper</title>
</head>
<body>
<main>
<tile-mine></tile-mine>
</main>
</body>
</html>
Now let's run and see what we did so far:
This will run our webpack-dev-server to run our site locally, and after that let's open it on http://localhost:8000
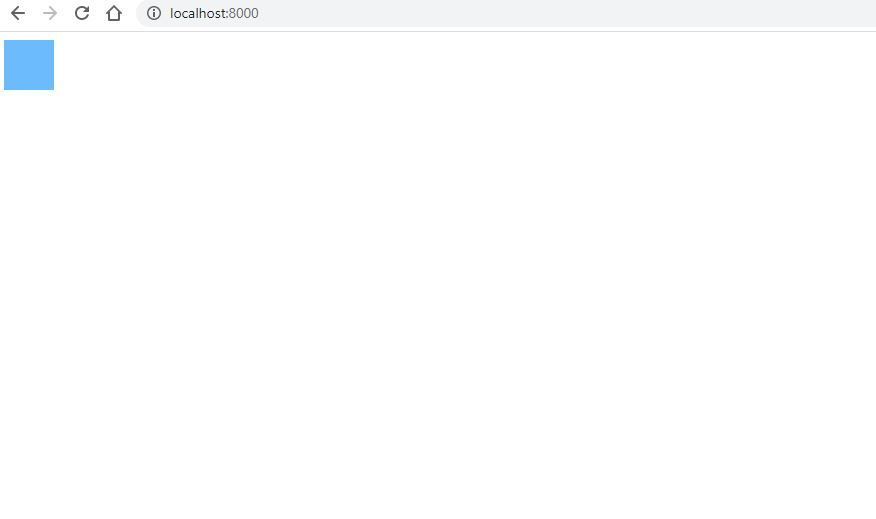
We now see our single tile on the screen.
Now, let's update our tile component to listen to attribute changes.
Inside our src/index.html, let's create multiple tile-mine and add attributes to it.
<main>
<tile-mine value="1" revealed="false"></tile-mine>
<tile-mine value="2" revealed="false"></tile-mine>
<tile-mine value="3" revealed="true"></tile-mine>
<tile-mine value="4" revealed="false"></tile-mine>
<tile-mine value="*" revealed="true"></tile-mine>
<tile-mine value="6" revealed="false"></tile-mine>
<tile-mine value="7" revealed="false"></tile-mine>
<tile-mine value="*" revealed="false"></tile-mine>
</main>

- value - refers to the value of the tile in minesweeper that ranges from 0 - 8, this value indicates how many bombs around a particular tile.
- revealed - state of the tile whether it's opened or closed.
Now let's update our src/components/tile.js
export class Tile extends HTMLElement {
constructor() {
super();
this.updateDOM();
}
set value(value) {
this.prop.value = value;
this.updateDOM();
}
set revealed(revealed) {
this.prop.revealed = revealed;
this.updateDOM();
}
get revealed() {
return this.prop.revealed;
}
get value() {
return this.prop.value;
}
updateDOM() {
const revealed = this.prop.revealed;
const tileValue = revealed ? this.prop.value : '';
const tileRevealedClass = revealed ? 'tile-opened' : '';
this.root.innerHTML = `
${componentStyle}
<div class="tile ${tileRevealedClass}">
${tileValue}
</div>`;
}
static get observedAttributes() {
return ['value', 'revealed'];
}
attributeChangedCallback(name, oldValue, newValue) {
switch (name) {
case 'value':
this.value = newValue;
break;
case 'revealed':
this.revealed = newValue;
break;
}
}
}
observedAttributes() - is a method that registers what our custom element attributes should listen when there's a change in it.
attributeChangeCallback()- from the name itself it's a callback function that triggers whenever the property of the custom element has changed.
We also updated our updateDom() method to change the innerHTML value when there's a change in the attributes.
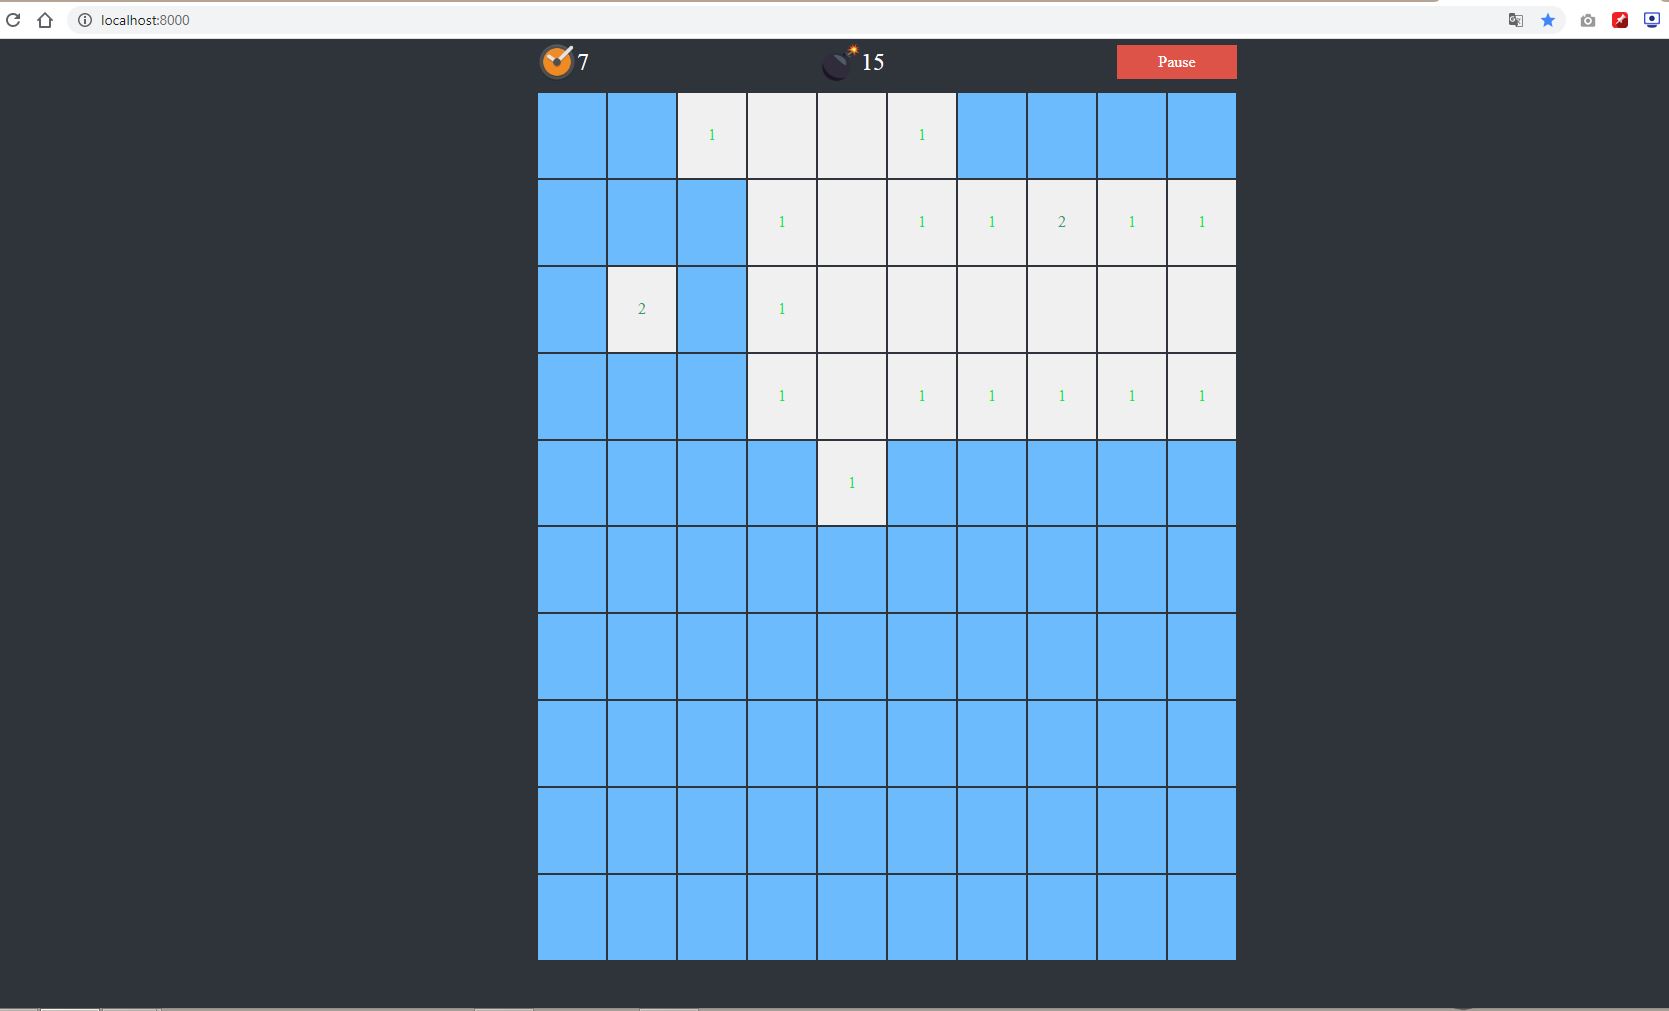
Reload and we'll have this output:

Before moving forward, please download the necessary assets for the game, click here to download
Put the downloaded zip inside src and extract and overwrite the existing assets folder.
Now let's write the code another component named game-manager that will hold all the tiles and manage the state of our game.
Create a new file src/components/game-manager.js
const componentStyle = `
.game-manager {
display: flex;
flex-direction: column;
width: 100%;
max-width: 700px;
height: 100%;
align-items: center;
padding: 3px;
}
.play-button,
.pause-button {
background-color: #4A8AF4;
color: #ffffff;
cursor: pointer;
font-size: 16px;
padding: 8px 10px;
width: 100px;
text-align: center;
}
.pause-button {
background-color: #DD5347;
display: none;
}
.game-header {
width: 100%;
display: flex;
justify-content: space-between;
align-items: center;
margin-bottom: 10px;
}
.time-text {
font-size: 24px;
color: #ffffff;
}
.time {
display: flex;
align-items: center;
}
.tile-container {
height: 100%;
width: 100%;
display: flex;
flex-wrap: wrap;
justify-content: center;
}
tile-mine {
margin: 1px;
}
`;
export class GameManager extends HTMLElement {
constructor() {
super();
this.init();
this.updateDOM();
setTimeout(() => {
this.initTiles();
}, 100);
}
init() {
this.root = this.attachShadow({ mode: 'open' });
this.time = 0; // Time counter
this.timeInterval = null; // For holding the time interval
this.isPlaying = false;
this.tilesRowCount = 10; // Tile row count
this.tilesColCount = 10; // Tile col count
this.tiles = []; // Tiles web component array
}
generateTilesContentAndBombs() {
const tiles = Array(10)
.fill(0)
.map(arr => [...Array(10).fill(0)]); // creates 10 x 10 Array
return tiles;
}
initTiles() {
this.tileContainerEl = this.root.querySelector('.tile-container');
this.tileContainerEl.innerHTML = '';
const tileValues = this.generateTilesContentAndBombs();
const tileWidth = this.tileContainerEl.offsetWidth / this.tilesColCount; // make tiles responsive
const tileHeight = this.tileContainerEl.offsetHeight / this.tilesRowCount; // make tiles responsive
this.tiles = tileValues.map((tileRow, row) => {
return tileRow.map((tile, col) => {
const tileEl = document.createElement('tile-mine'); // create our custom tile Element
tileEl.style.width = `${tileWidth - 2}px`; // Put a little bit of margin
tileEl.style.height = `${tileHeight - 2}px`;
this.tileContainerEl.appendChild(tileEl); // Appends tile inside the .tile-container
return tileEl;
});
});
}
updateDOM() {
this.root.innerHTML = `
${componentStyle}
<div class="game-manager">
<div class="game-header">
<div class="time">
<img src="./assets/images/time.png" height="40">
<span id="timeText" class="time-text"></span>
</div>
<div class="time">
<img src="./assets/images/bomb.png" height="40">
<span class="time-text">15</span>
</div>
<div id="playButton" class="play-button">Play</div>
<div id="pauseButton" class="pause-button">Pause</div>
</div>
<div class="tile-container">
</div>
</div>
`;
}
}
customElements.define('game-manager', GameManager);
updateDom() - sets the element innerHTML.
init() - initializes component's variable and shadowDom
initTiles() - creates a 10 x 10 tile grid using our Tile web component
generateTilesAndBomb() - a function that will hold the generation of bombs and counting of bombs per tile
Now let's update our src/index.html file, to add our game-manager web component
DOCTYPE html>
<html lang="en">
<head>
<meta charset="UTF-8" />
<meta name="viewport" content="width=device-width, initial-scale=1.0" />
<meta http-equiv="X-UA-Compatible" content="ie=edge" />
<link rel="stylesheet" href="assets/css/style.css" />
<title>Webcomponent Minesweeper</title>
</head>
<body>
<main>
<game-manager></game-manager>
</main>
</body>
</html>
If we refresh the page we will see this screen:
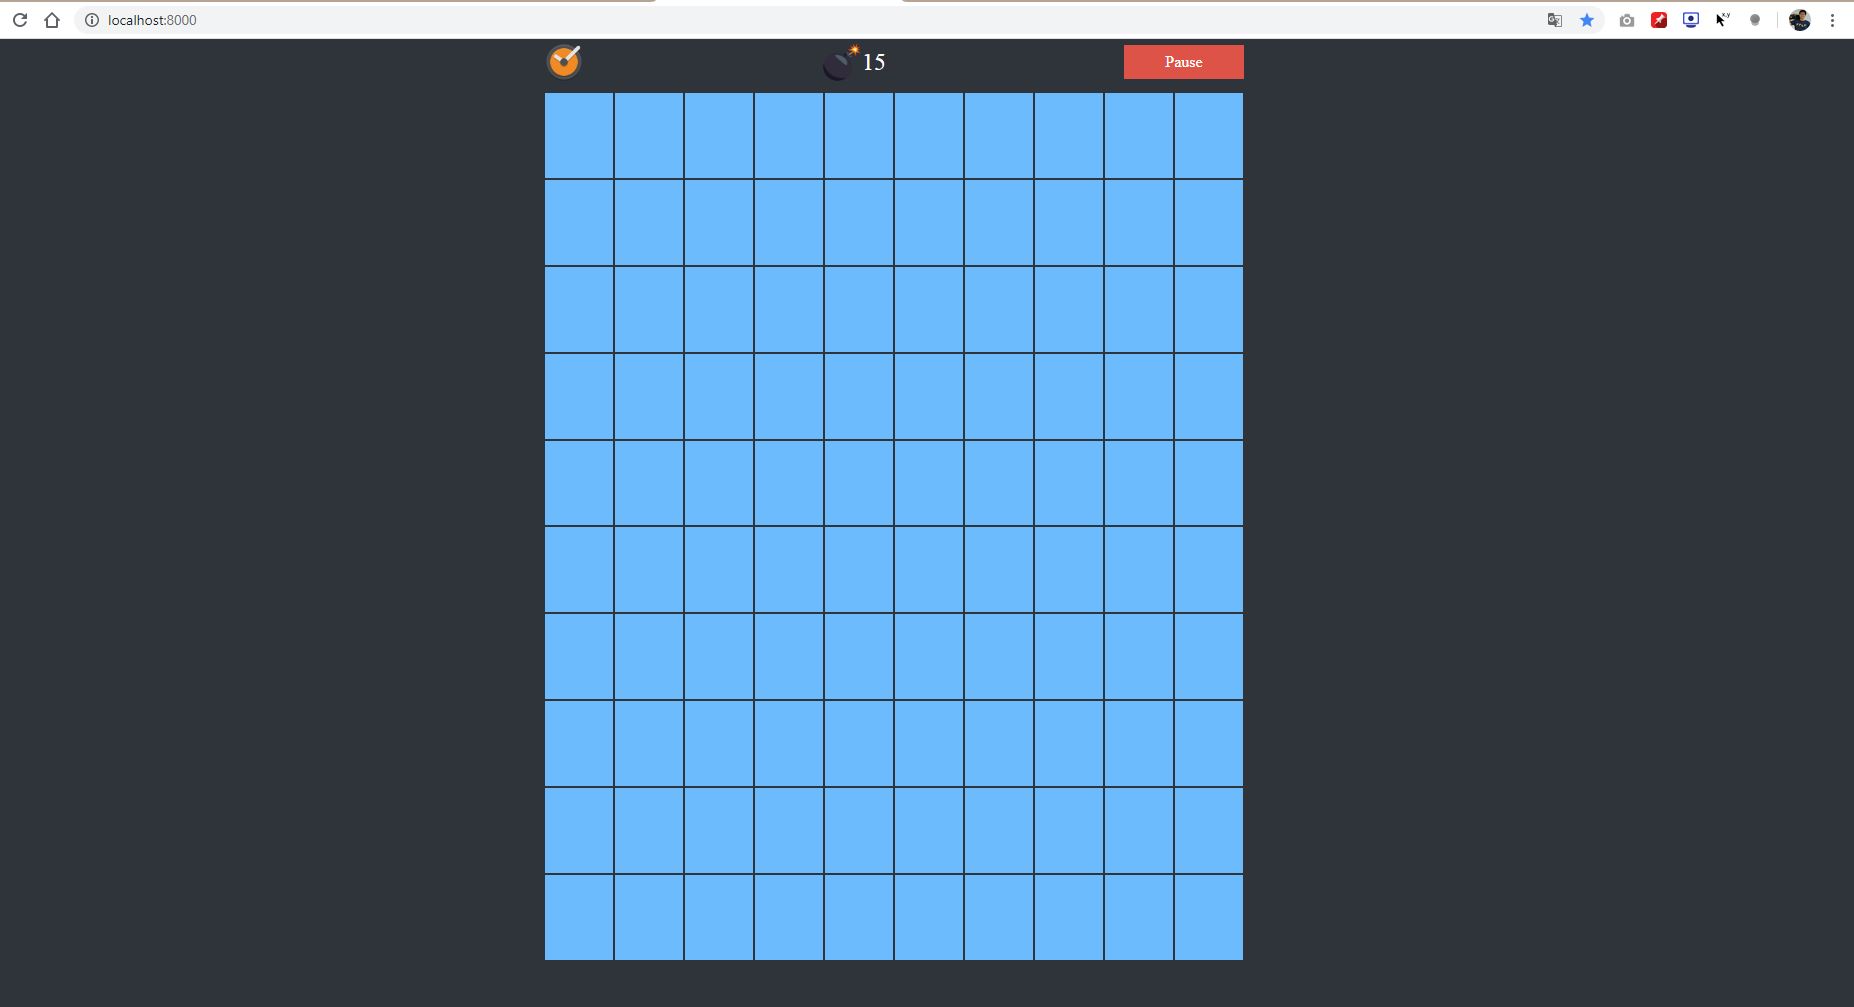
If we click the tile nothing will happen for now, so now let's add functionality.
The first functionality that we are going to add is a counting time.
Add this function inside the GameManager class.
initTimeInterval() {
clearInterval(this.timeInterval); // clear time interval if there's any existing one
this.timeInterval = setInterval(() => {
if (this.isPlaying) {
this.time++; // Increments the time per second
this.root.querySelector('#timeText').innerHTML = this.time;
}
}, 1000);
}
- this.timeInterval - will hold the setInterval function, that will execute the codes inside every 1 second or 1000 ms
A minesweeper game wouldn't be one if there's no mines or bomb, so now let's add a function that will add the random position of bombs to our game.
Add these two functions inside the GameManager class.
addBombToTiles(tiles) {
const takenCells = [];
const numberOfBombs = 15;
for (let i = 0; i < numberOfBombs; i++) {
let r;
let c;
do {
r = Math.floor(Math.random() * 10);
c = Math.floor(Math.random() * 10);
} while (takenCells.includes(`${r}-${c}`));
takenCells.push(`${r}-${c}`);
tiles[r][c] = '*';
}
return tiles;
}
countTilesBomb(tiles) {
const lastRowIndex = this.tilesRowCount - 1;
const lastColIndex = this.tilesColCount - 1;
for (let r = 0; r < this.tilesRowCount; r++) {
for (let c = 0; c < this.tilesColCount; c++) {
if (tiles[r][c] === 0) {
let bombCount = 0;
const minR = r === 0 ? 0 : r - 1;
const maxR = r === lastRowIndex ? lastRowIndex : r + 1;
const minC = c === 0 ? 0 : c - 1;
const maxC = c === lastColIndex ? lastColIndex : c + 1;
for (let ir = minR; ir <= maxR; ir++) {
for (let ic = minC; ic <= maxC; ic++) {
bombCount += +(tiles[ir][ic] === '*');
}
}
tiles[r][c] = bombCount;
}
}
}
return tiles;
}
addBombToTiles() - will add bombs in random positions to our tiles array
countTilesBomb() - will put value from 0 - 8 to a non-bomb tile, that indicates the number of bombs around it
Let's update the generateTilesContentAndBombs() to implement addBombToTiles() and countTilesBomb()
generateTilesContentAndBombs() {
const tiles = Array(10)
.fill(0)
.map(arr => [...Array(10).fill(0)]);
return this.countTilesBomb(this.addBombToTiles(tiles)); // Modified part
}
Next is to add the opening of tiles functionality.
Add these 3 functions to our GameManager class
clickTile(row, col) {
if (this.isPlaying) {
this.openTile(row, col);
}
}
openTile(r, c) {
const tile = this.tiles[r][c];
if (tile.value === '*') {
tile.revealed = true;
this.isPlaying = false;
setTimeout(() => {
this.gameOver();
}, 1000);
} else {
this.recursiveOpenTiles(r, c);
this.checkWin();
}
}
recursiveOpenTiles(r, c) {
const tile = this.tiles[r][c];
if (tile.revealed) {
return;
}
if (tile.value !== 0 && tile.value !== '*') {
tile.revealed = true;
return;
}
tile.revealed = true;
// up
if (r > 0) this.recursiveOpenTiles(r - 1, c);
// Down
if (r < 9) this.recursiveOpenTiles(r + 1, c);
// left
if (c > 0) this.recursiveOpenTiles(r, c - 1);
// Down
if (c < 9) this.recursiveOpenTiles(r, c + 1);
}
clickTile() - will open a tile base on a given row and column
openTile() - will open a tile and checks if its value is * which indicates a mine and it will trigger the gameOver function that we will create later
recursiveOpenTiles() - opens tiles recursively when the tile opened has other tiles around it whose value is 0, it will cause a chain effect until it opened a tile with a number greater than 0
Next, let's update the initTiles() function to add click event in every tile
initTiles() {
this.tileContainerEl = this.root.querySelector('.tile-container');
this.tileContainerEl.innerHTML = '';
const tileValues = this.generateTilesContentAndBombs();
const tileWidth = this.tileContainerEl.offsetWidth / this.tilesColCount;
const tileHeight = this.tileContainerEl.offsetHeight / this.tilesRowCount;
this.tiles = tileValues.map((tileRow, row) => {
return tileRow.map((tile, col) => {
const tileEl = document.createElement('tile-mine');
tileEl.style.width = `${tileWidth - 2}px`;
tileEl.style.height = `${tileHeight - 2}px`;
tileEl.value = tile;
tileEl.addEventListener('click', () => this.clickTile(row, col)); // Add this line
this.tileContainerEl.appendChild(tileEl);
return tileEl;
});
});
}
Next is let's update our Tile Web component, to display bomb image instead of * and other visual related codes.
Update the existing updateDom() to use the tileValue() function which maps its value in a presented manner.
updateDOM() {
const revealed = this.prop.revealed;
const tileValue = revealed ? this.tileValue() : '';
const tileRevealedClass = revealed ? 'tile-opened' : '';
this.root.innerHTML = `
${componentStyle}
<div class="tile ${tileRevealedClass}">
${tileValue}
</div>`;
}
tileValue() {
const value = this.prop.value;
const numberColors = [
'#18E54C',
'#1FA363',
'#4A8AF4',
'#18B1E5',
'#FFCD42',
'#FF8F6B',
'#E0683D',
'#DD5347'
];
if (value === '*') {
return `<img src="./assets/images/bomb.png" height="20">`;
} else if (+value > 0) {
return `<span style="color: ${numberColors[+value - 1]};">${value}<span>`;
}
return '';
}
Now let's wrap our game functionality by adding gameOver, checkWin and other necessary functionalities
Before that let's add some fancy alert Javascript Library using SweetAlert
npm install sweetalert2 --save
Import it inside the game-manager.js file
import Swal from 'sweetalert2';
Now let's add these functions to our GameManager
welcomeMessage() {
Swal.fire({
title: 'Welcome',
html: 'Created by Stephen Vinuya',
icon: 'success',
onClose: () => this.play()
});
}
initButtons() {
this.playBtnEl = this.root.querySelector('#playButton');
this.pauseBtnEl = this.root.querySelector('#pauseButton');
this.playBtnEl.addEventListener('click', () => this.play());
this.pauseBtnEl.addEventListener('click', () => this.pause());
}
pause() {
this.isPlaying = false;
this.playBtnEl.style.display = 'block';
this.pauseBtnEl.style.display = 'none';
}
play() {
this.isPlaying = true;
this.playBtnEl.style.display = 'none';
this.pauseBtnEl.style.display = 'block';
}
gameOver() {
Swal.fire('Game over', 'Restart the game', 'error');
this.resetGame();
}
resetGame() {
this.isPlaying = false;
this.time = 0;
this.root.querySelector('#timeText').innerHTML = this.time;
this.initGame();
}
checkWin() {
const tilesWithoutBomb = this.tiles
.reduce((acc, tilesRow) => [...acc, ...tilesRow], [])
.filter(tile => tile.value !== '*'); // Gets all tiles which are not bomb
const isAllTilesOpen = tilesWithoutBomb.every(tiles => tiles.revealed); // checks it all tiles that are not bomb is revealed
if (isAllTilesOpen) {
Swal('Game over', 'You win the game!', 'success');
this.resetGame();
}
}
initGame() {
this.initTimeInterval();
this.initTiles();
this.welcomeMessage();
}
welcomeMessage() - show's a welcome message using SweetAlert dialog
initButtons() - initializes button element for pause and play and assigns click event to it
play() - play the time and allow for tile click
pause() - pause the time and don't allow for tile click
gameOver() - shows a game over message and resets the game
resetGame() - resets our game state
checkWin() - checks if the player has already won the game, and show a success SweetAlert dialog
initGame() - initializes or starts the game
Next is let's update our constructor method inside the GameManager class to use some of our newly created method
constructor() {
super();
this.init();
this.updateDOM();
setTimeout(() => {
this.initButtons();
this.initGame();
}, 100);
}
We are wrapping the code for initButtons and initGame functions inside a setTimeout cause there's some delay on our view initialization
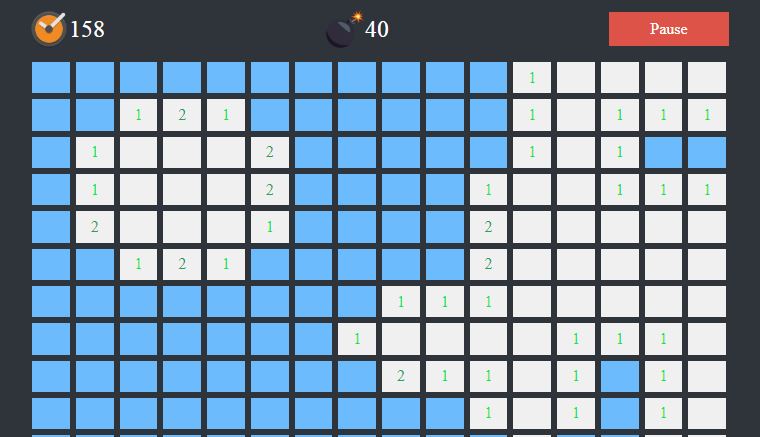
After refreshing the page, you can see that we have completed now our game.
If you are satisfied already, you can go now and relax, but if you want to stay, we will now make our game, a PWA app using Workbox
PWA stands for Progressive Web Application, we're in our app can work offline, can have push notifications and can be installable.

Now, let's start!
First, we need to install the workbox-cli and its webpack-plugin via terminal
npm install workbox-cli -g && npm i workbox-webpack-plugin -D
Next is to run the workbox wizard
Follow the steps below:
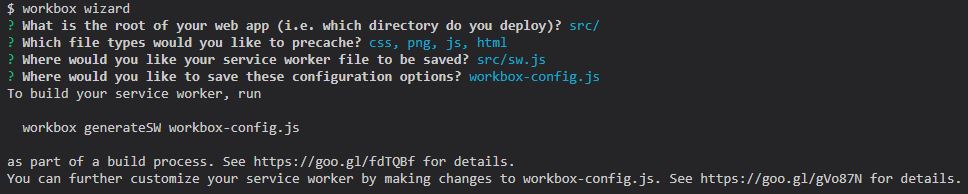
And it will generate our workbox-config.js file
Next, it to update our webpack.config.js file
const path = require('path');
const HtmlWebpackPlugin = require('html-webpack-plugin');
const { GenerateSW } = require('workbox-webpack-plugin');
const CopyPlugin = require('copy-webpack-plugin');
module.exports = {
entry: './src/index.js',
output: {
filename: 'main.js',
path: path.resolve(__dirname, 'dist')
},
plugins: [
new HtmlWebpackPlugin({
template: './src/index.html'
}),
new CopyPlugin([{ from: './src/assets', to: 'assets' }]),
new GenerateSW({
],
devServer: {
contentBase: path.join(__dirname, 'dist'),
compress: true,
port: 8000
}
};
And let's update our index.js file to register our service worker.
import './components/tile';
import './components/game-manager';
if ('serviceWorker' in navigator) {
window.addEventListener('load', () => {
navigator.serviceWorker.register('./sw.js');
});
}
Next, is to generate a manifest.json using this online generator https://app-manifest.firebaseapp.com/,to tell our browser that this web app is installable
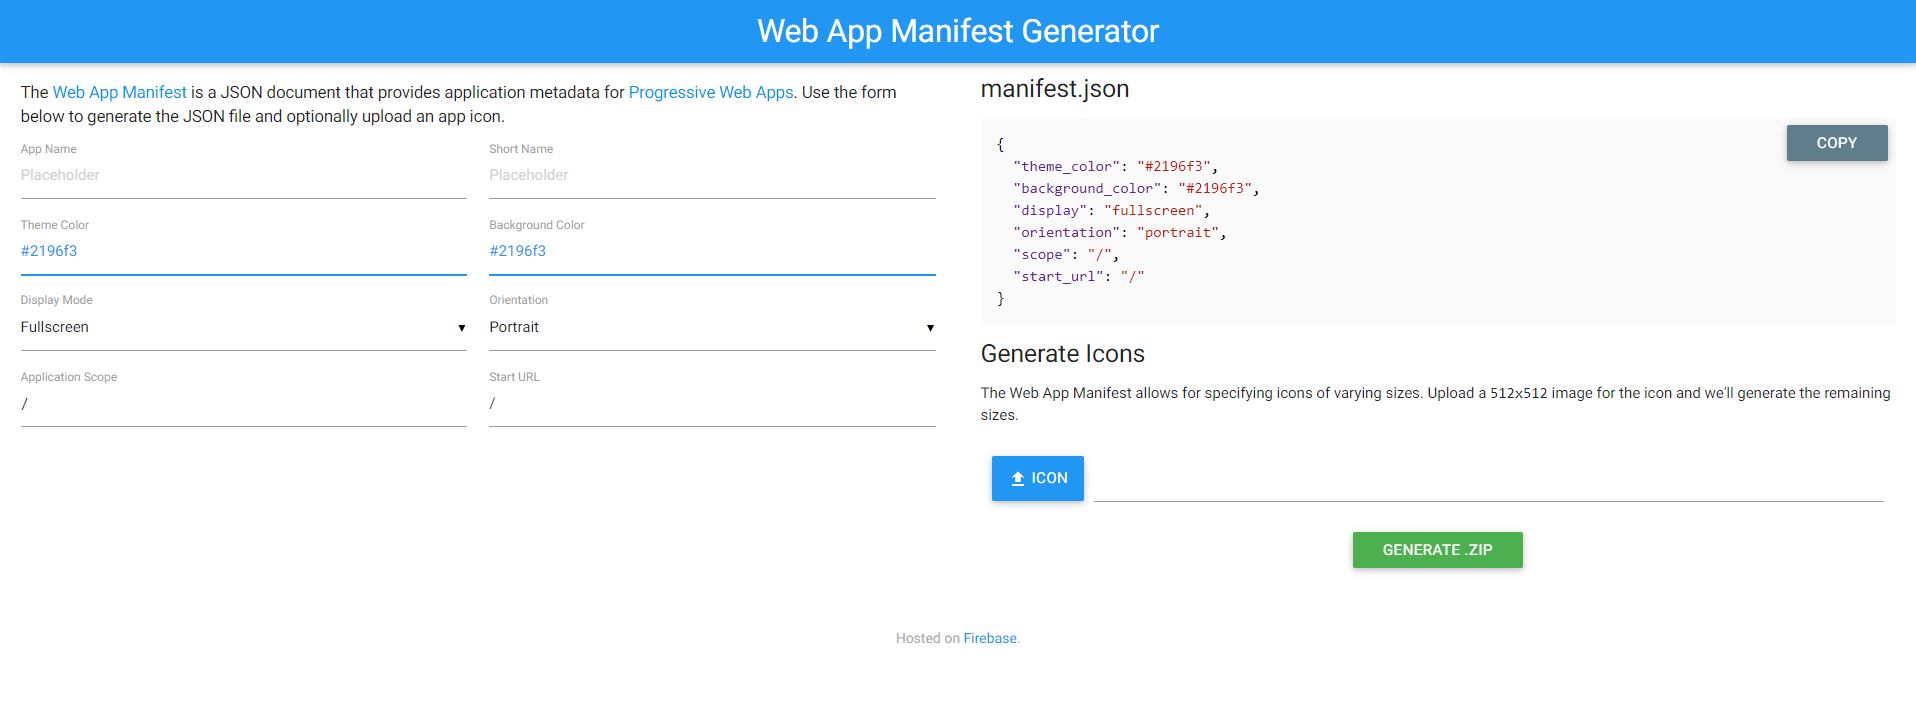
Fill the form up, make sure to choose for Portrait for orientation and Fullscreen for display mode, and choose any icon of your preference.
Then click Generate zip, you will have these files inside the zip.
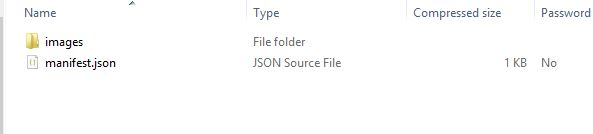
Move all the images in the images folder into our app src/assets/images/icons
And the manifest.json inside the src.
And let's reference the manifest.json inside the index.html
DOCTYPE html>
<html lang="en">
<head>
<link rel="manifest" href="manifest.json" />
<meta charset="UTF-8" />
<meta name="viewport" content="width=device-width, initial-scale=1.0" />
<meta http-equiv="X-UA-Compatible" content="ie=edge" />
<link rel="stylesheet" href="assets/css/style.css" />
<title>Webcomponent Minesweeper</title>
</head>
<body>
<main>
<game-manager></game-manager>
</main>
</body>
</html>
Now we are all good!
Demo: https://onecompileman.com/minesweeper-web-component/
Repository: https://github.com/onecompileman/minesweeper-web-component